
In the previous parts of this topic, we have seen how to implement a microcontroller based leak detector and managed to connect the sensor to the home wifi and send messages over MQTT. Now it’s time to take this to the next level and start some automation based on this connectivity and the sensor data. To do that I have started with a quick research of the existing automation platforms for sensor / IoT data that offer native support for MQTT, are open source and offer a self hosted deployment (cloud being optional). The main contenders identified were:
- Node-Red
- Home Assistant
- n8n
I find Node-Red to be well suited for this project, it is a visual workflow based tool that offers dashboards and notifications capabilities and allows to develop custom functions based on javascript.
Home Assistant is a full fledged ecosystem of off the shelf sensor integrations and provides the possibility for automation and actions, scenes and a powerful more user friendly interface, however I decided to work with home assistant as a second step once I managed some initial low level automation with node-red.
N8N is somehow similar to node-red, being a visual workflow automation tool, it is more adapted to business solutions, enterprise automation and integration with Artificial Intelligence (AI) tools. N8N can be very powerful but is not particularly adapted to the world of sensors and IoT, therefore I have judged it not the best solution for this projects.
Setting up Node-Red
Since we have used our Raspberry Pi to host the MQTT broker in part 3 of this serie, we can also install node-red on the same platform, you can follow the official guide.
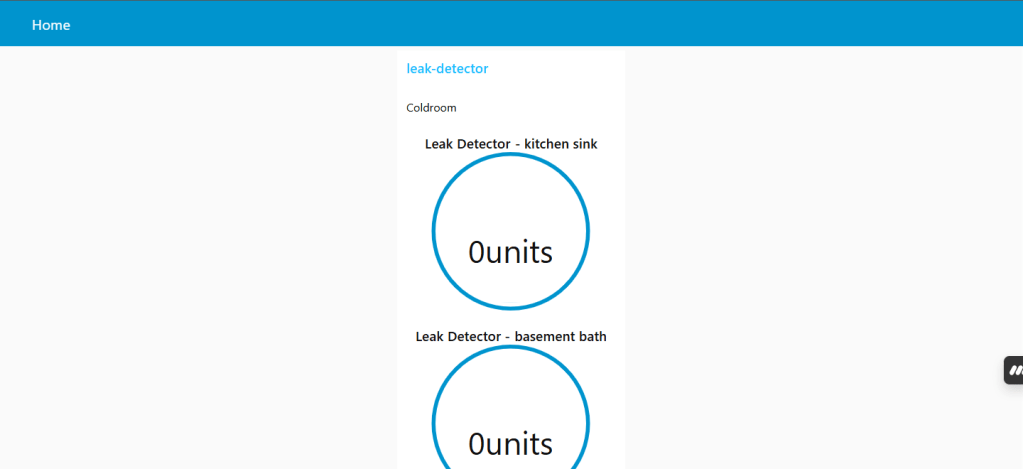
Once the setup is complete, you will get access to your node-red portal while connected to the same home network where your Pi is. There are two main portals you can access, the workflow editor which allows you to design your workflow and deploy them and the dashboard which allows you to view gauges and counters, messages etc from a running workflow.
To access the workflow editor enter https://PI_IP_ADDRESS:1880 in your browser (replace (PI_IP_ADDRESS with your actual Pi device IP address, hopefully you have set it as static in the previous steps).
To access the dashboard enter https://PI_IP_ADDRESS:1880/ui/ in your browser.
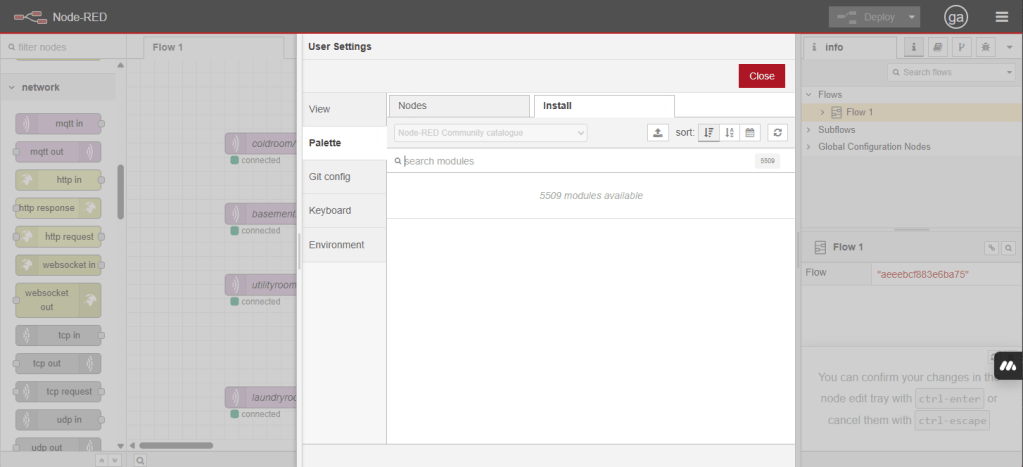
We will start working on the workflow editor but first we need to install some add-ons from the settings/palette/install menu and search for the palettes “node-red-contrib-open” and “node-red-dashboard” and click install for both.
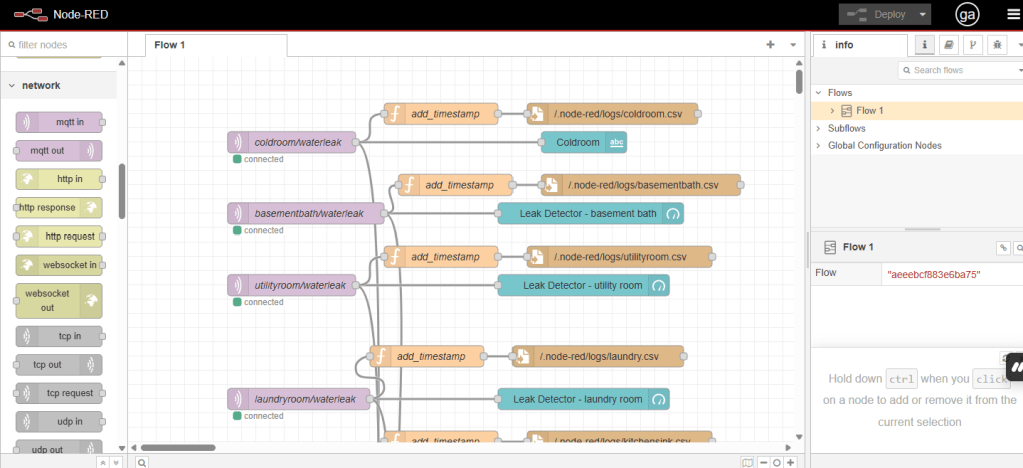
The workflow editor canva is a drag and drop style sandbox with boxes representing inputs, outputs and functions and connecting lines between the boxes to indicate the flow from one box to the next.
The left column, menu contains all available boxes grouped in families such as “common”, “function”, “network”, “output” and “dashboard”.
Our overall workflow is not going to be complicated, we want to connect multiple “leak detector” sensors, each on its own MQTT topic and take actions based on the detection of the message:
- Notify an email address that there is a leak
- Update the node red sensor dashboard
- log the leak detector value levels (in this example I chose to show some water levels instead of a simple binary message.
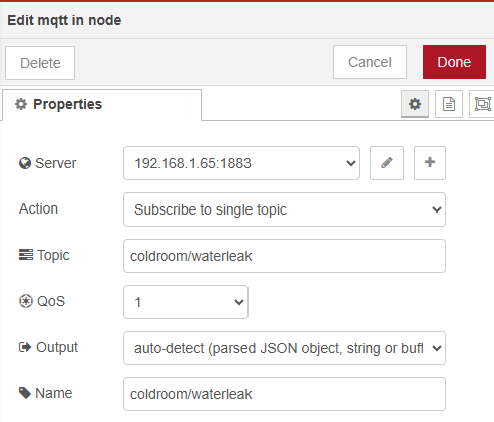
Since our first input is going to be a MQTT message we will add the block “mqtt in” under the group “network”. when you double click on this box you can configure the MQTT broker IP address (see part 3 for the setup of the MQTT) and the topic this box will monitor.
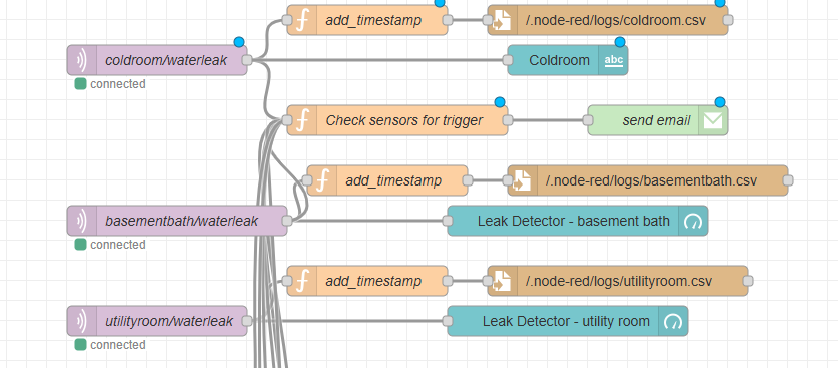
The blue box represents the dashboard item.

The time stamp and log writing to a .csv file are self explanatory.
The custom function “check sensors for trigger” is to add some logic if any sensor from the group of leak sensors triggers a leak, node-red can trigger a “send email” action. Since the code used in node red is javascript and I am not really knowledgeable in this language, I relied on Chat GPT to generate the code, the sample below shows the code I used:
// Sensor topics and their mapping to human-readable names
let sensorMap = {
    "coldroom/waterleak" : "coldroom",
    "utilityroom/waterleak" : "utilityroom",
    "basementwash/waterleak" : "basementwash",
    "laundryroom/waterleak": "laundryroom",
    "kitchensink/waterleak": "kitchensink",
    "powderroom/waterleak": "powderroom",
    "fridge/waterleak": "fridge",
    "garagehosebib/waterleak": "garagehosebib",
    "masterwash/waterleak" : "masterwash",
    "kidswash/waterleak" : "kidswash"
};

// Time buffer (in milliseconds)
let timeBuffer = 90 * 60 * 1000;  // 90 minutes

// Get current sensor reading and topic
let sensorName = sensorMap[msg.topic];
let sensorValue = parseFloat(msg.payload);  // Convert the payload to a number

// Store sensor readings in the flow context
let sensorReadings = flow.get("sensorReadings") || {};
sensorReadings[sensorName] = sensorValue;
flow.set("sensorReadings", sensorReadings);

// Define the threshold
let threshold = 0.5;

// Get the current time
let currentTime = new Date().getTime();

// Check if all sensors have sent their readings
if (Object.keys(sensorReadings).length === 5) {
    let triggeredSensors = [];

    // Check each sensor against the threshold
    for (let sensor in sensorReadings) {
        if (sensorReadings[sensor] > threshold) {
            triggeredSensors.push(sensor);
        }
    }

    // If any sensors exceeded the threshold
    if (triggeredSensors.length > 0) {
        let lastEmailSent = flow.get("lastEmailSent") || 0;

        // Check if 90 minutes have passed since the last email
        if (currentTime - lastEmailSent > timeBuffer) {
            // Prepare email payload
            let sensorList = triggeredSensors.join(", ");
            let emailPayload = {
                topic: "Sensor Alarm Triggered",
                payload: `The following sensors exceeded the threshold of ${threshold}: ${sensorList}`,
                to: "sehsiko@gmail.com"
            };

            // Send the email
            node.send([null, emailPayload]);

            // Update the last email sent timestamp
            flow.set("lastEmailSent", currentTime);
        } else {
            // Do not send an email if time buffer has not passed
            node.warn("Email not sent, waiting for the 90-minute buffer.");
        }
    }
}

// Pass the original message through the flow (if needed)
return [msg, null];
The last block “send email” contains the SMTP account details (you can use Gmail after following a guide to connect it that you can easily search.
Once the logic is complete, you can click “deploy” for your project and if there are no errors it should be active. You can now move to the dashboard page and test the leak detector gauges or alarms.
Node red allows a lot of different options and the availability of custom functions that you can code yourself makes it a very powerful platform for sensor automation. Try some other ideas for yourself and look up some of the available projects online for inspiration!

Leave a comment